分類
Linux 软件

Turmux X11 以及 VSCode

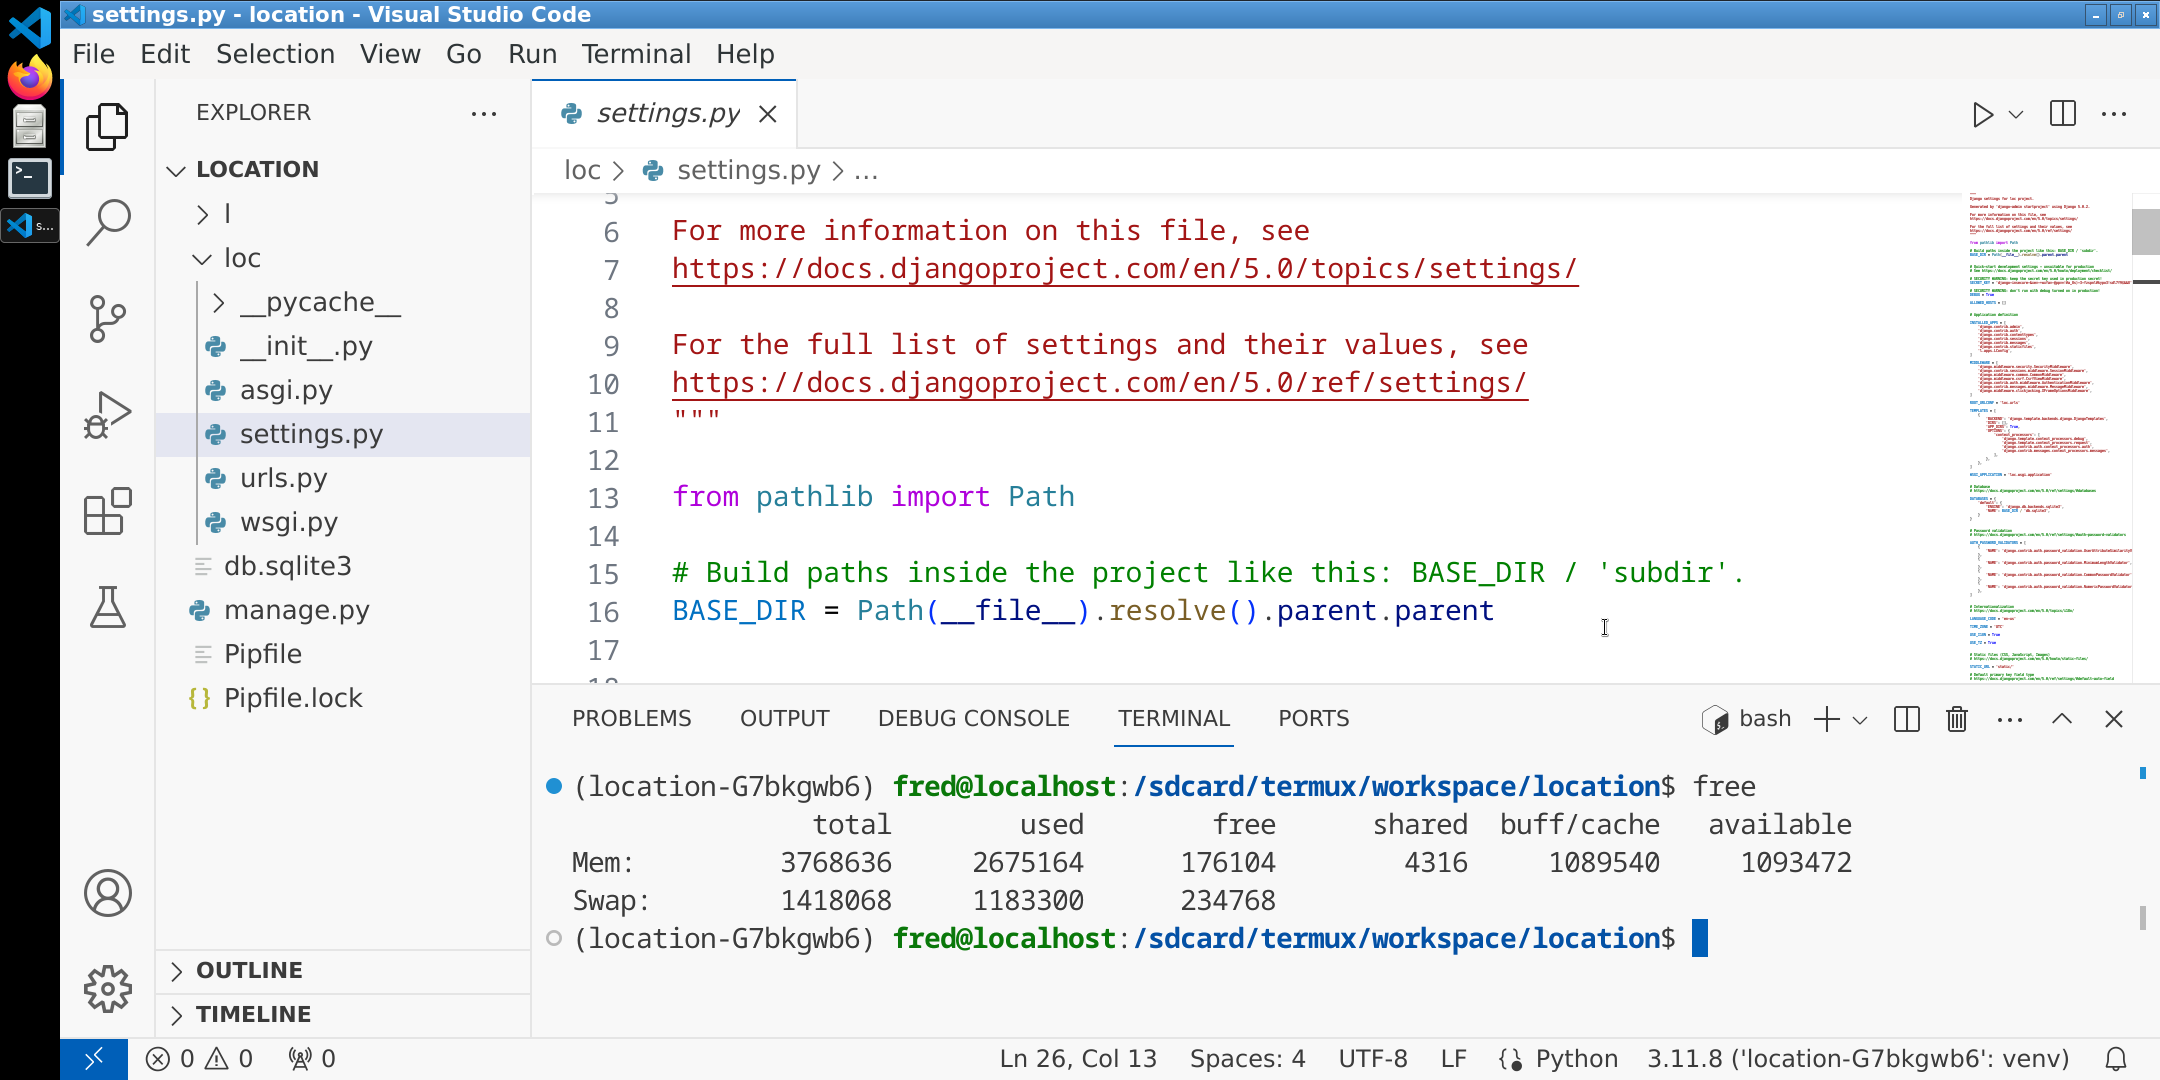
本篇文件介紹如何在安卓手機上運行 VSCode 來實現在旅途中繼續編碼。我使用的手機是 2018 年的 Xperia XZ2,內存只有 4GB,CPU 型號是 Qualcomm SDM845,屏幕是 5.7 in (140 mm) 1080p (2160 × 1080) IPS LCD, ~424 pixel density。最終效果如下:

VSCode On Debian With Termux

藉助 Termux 我們得以在安卓上運行多種 Linux,之所以選擇 Debian 是因爲它相對輕量且不含 systemd (安卓不支持)。本文得以形成主要是參考了 Termux X11:手機的X伺服器使用教學Android手機安裝Linux發行版:Termux proot-distro使用教學 以及 VSCode installation tutorial with Termux-x11,在此一併感謝!

如果你的手機性能良好,推薦按照 Ivon 的文章安裝 Xfce4 桌面環境,這樣東西就一應俱全了(除了不能運行 Docker,安卓內核不支持)。

安裝 Termux

雖然可以直接去 Github 下載安裝包,但是還是建議去 F-Droid 安裝Termux。當前的最新版本是 0.118.0。安裝完成後執行下列命令:

pkg update
pkg upgrade
pkg install nano proot-distro x11-repo termux-x11-nightly
termux-setup-storage

安裝 X11

這裏需要到 Github 下載 X11 的安裝包。如果沒有 Github 賬戶,可以從這裏下載我安裝的這個版本。

安裝 Debian

手機性能好的話,可以嘗試其他口味的 Linux 以及桌面環境。我的手機連 Xfce4 也運行不起來(X11 裏可以,但是 Debian 裏就會自動退出),所以我使用輕量的 openbox。

proot-distro install debian
#進入 Debian
proot-distro login debian
apt update
apt upgrade
apt install nano sudo wget git
#添加普通用戶
passwd
groupadd storage
groupadd wheel
groupadd video
#替換 [USER] 爲你想要的名字
useradd -m -g users -G wheel,audio,video,storage -s /bin/bash [USER]
passwd [USER]
visudo
#在 root ALL=(ALL:ALL) ALL 這行的後面添加
[USER] root ALL=(ALL:ALL) ALL
#保存後使用 exit 退出 Debian

創建兩個腳本來啓動和關閉 X11:

##以下是startDebian.sh
#!/bin/bash
export DISPLAY=:0
killall -9 termux-x11 termux-wake-lock
# 啟動Termux X11
am start --user 0 -n com.termux.x11/com.termux.x11.MainActivity
XDG_RUNTIME_DIR=${TMPDIR}
termux-x11 :0 &
sleep 3

proot-distro login debian --user [USER] --shared-tmp
##以下是stopDebian.sh
#!/bin/bash
killall -9 termux-x11

然後給予可執行權限:

chmod +x startDebian.sh
chmod +x stopDebian.sh
#然後執行 startDebian.sh 就能就如 Debian 了
./startDebian.sh
#若出現報錯 ERROR: openbox-xdg-autostart requires PyXDG to be installed 可以按回車鍵忽略
#安裝窗口管理器
sudo apt install xorg openbox
sudo apt install firefox-esr fonts-noto-cjk proxychains4 curl tint2 xclip pcmanfm
#火狐:你需要一個瀏覽器
#fonts-noto-cjk:字體
#proxychains4:沒有代理不科學
#curl:安裝 curl 可以修復使用 proxychains4 時 library "libdl.so.2" not found 的錯誤
#tint2:任務欄讓桌面更美好
#pcmanfm:桌面環境怎能少得了文件管理器
#xclip:把剪切版的內容從安卓傳遞到 Debian

# .bashrc 中添加下面文本

alias pp='termux-clipboard-get | xclip -sel clipboard'
alias p='proxychains4'

export DISPLAY=:0
if ! pgrep -x "openbox" > /dev/null; then
    openbox-session &
    tint2 &
fi

安裝 VSCode

前往 VSCode 下載頁,下載 Arm64 版本的 .deb 安裝包。可以通過瀏覽器下載,然後下載頁會有下載的直鏈,複製後用 wget 下載就好。

#安裝 VSCode
sudo dpkg -i /sdcard/Downloads/code-[VERSION].deb
#如果出現報錯嘗試
sudo apt --fix-broken install
#然後再試試上面的 dpkg 安裝指令

最在啓動欄創建兩個常用的快捷啓動方式:先修改下桌面快捷方式

#把 /usr/share/applications/code.desktop 中的
Exec=/usr/share/code/code --unity-launch %F
#改爲
Exec=/usr/share/code/code --no-sandbox %F

#把 /usr/share/applications/firefox-esr.desktop 中的
Exec=/usr/lib/firefox-esr/firefox-esr %u
#改爲
Exec=/usr/lib/firefox-esr/firefox-esr --no-sandbox %u

兩個手機點一下桌面(黑屏)呼出右鍵菜單,選擇 Applications > Settings > Tint2 Settings 。點擊左上角編輯,Panel 推薦設置在左邊,length 150%,size 60 pixels。Panel items 留下 Launcher 和 Taskbar 即可。Lanucher 裏選擇 VS Code 和 Firefox ESR 保存即可。

既然提到了命令行啓動火狐,順便記錄下火狐的多用戶。在命令行加上 -P 可以啓動 Profile 管理器。在管理器裏可以新增、重命名以及設置默認的用戶。想以用戶 42 啓動,則把上面快捷方式裏的運行項改爲 /usr/lib/firefox-esr/firefox-esr --no-sandbox -P 42 %u 即可。

Firefox 在 A Profile 升級後,从 B Profile 啟動可能會出現問題:"You've launched an older version of firefox" "Using an old version of Firefox..."。此時可以在啟動命令後加上 -allow-downgrade 就可以啟動了。然後關閉火狐就可以正常啟動了。

使用場景

開始使用

  1. 啓動 Termux
  2. ./startDebian.sh

退出

  1. 切換到 Termux,執行 exit
  2. ./stopDebian.sh

其他小撇步

字體非常小:在 Debian 家目錄新增文件 nano ~/.Xdefaults 內容爲 Xft.dpi: 192 即指定 dpi 分辨率爲 192。如果個別應用字體還是很小,可以嘗試通過應用自己的配置來調整顯示大小。顏色深度也可以在這裏配置,例如:Xft.depth: 16

剪切版:從 Debian 到安卓默認是沒問題的,除非你在 X11 的配置項裏禁用了。但是從安卓到 Debian 卻不輕鬆。目前一個可行的方案就是上面使用 xclip 的方式:首先切換到 Termux,運行 alias pp,然後就可以在 Debian 裏粘貼了。

中文輸入:本篇沒有安裝中文輸入法,以節省更多資源予 VSCode。

掛載外部 SD Card 到 Debian:啓動時加入 --bind /data/data/com.termux/files/home/storage/external-1:/sdcard1 就會將外部儲存卡的可用目錄掛載到 proot 系統裏的 /sdcard1。手機裏的內部儲存默認是掛載在 /sdcard 的。

時間來到 2024 年底,Copilot 不使用代理已經無法登錄和使用了。雖然 VSCode 的配置項中可以設置代理,但是如果想讓 Copilot 走代理則需要使用 http 類型代理且在設置中將 Proxy Support 從默認的 override 切換為 on。這樣就不會再出現Extension activation failed: "tunneling socket could not be established, cause=socket hang up這個錯誤了。

本文更新於 2024/11/21。

分類
Linux

使用 xinput 映射鼠標按鍵

鼠標左鍵故障無法使用了,可以使用 xinput 將其他不常用的按鍵映射爲左鍵。Fedora 的 Xfce 桌面環境沒有默認安裝 xinput,需要手動安裝一下。

sudo dnf install xinput
#查看設備列表
xinput list
#比如我的鼠標會找到
Bluetooth Mouse M336/M337/M535 Mouse    	id=20	[slave  pointer  (2)]
#後續操作使用 20 和 Bluetooth Mouse M336/M337/M535 Mouse 都可以
#查看此鼠標當前的按鍵映射配置
xinput --get-button-map 'Bluetooth Mouse M336/M337/M535 Mouse'
1 2 3 4 5 6 7 8 9 10 11 12
#查看當前鼠標按鍵
xinput test 'Bluetooth Mouse M336/M337/M535 Mouse'
#當你操作鼠標時機會顯示哪個按鍵有動作
#通過映射拯救左鍵
xinput set-button-map 'Bluetooth Mouse M336/M337/M535 Mouse' 1 1 3 4 5 1 1 1 1 1 1 1
#我把不常用的鍵都指定成左鍵了
#測試沒有問題後可以將映射的指令添加到開機啓動裏
#Applications > Settings > Session and Startup > Application Autostart
/usr/bin/xinput set-button-map 'Bluetooth Mouse M336/M337/M535 Mouse' 1 1 3 4 5 1 1 1 1 1 1 1

用了一小段時間後發現,似乎鼠標滾輪也不是很好,所以最終在屋裏找到另一隻鼠標後,放棄了這隻。建議大家旅行時攜帶鼠標最好有個盒子,免得擠壓導致鼠標死亡。

分類
软件

nginx 默認配置下載文件 403

裝了個 nginx 臨時分享一下文件,但是文件複製到 /usr/share/nginx/html 中後訪問卻提示 403。排除防火牆、文件權限和所有者的問題後,發現是 SElinux 的原因。

#查看 SELinux 上下文
ls -lZ
#大概是這樣的
-rw-r--r--. 1 root root system_u:object_r:httpd_sys_content_t:s0     3086 Jan 28 13:39 index.html
-rwxr-xr-x. root root unconfined_u:object_r:user_home_t:s0 ToBeShared.zip
#只要 user_home_t 改成 httpd_sys_content_t 就可以了
sudo chcon -t httpd_sys_content_t ToBeShared.zip

更多參考:Nginx 403 error for single file while others workSELinux documentation from RedHat

分類
程序

在 CentOS 8 上使用 Xvfb 和 PyAutoGUI

本文介紹在 CentOS 8 上使用 PyAutoGUI 操作運行與 Xvfb 桌面環境中的 Firefox 所需的準備。由於所操作網頁需要登錄並有 OTP,所以還需要使用 VNC 來手動輸入密碼以做準備工作。

安裝 Xvfb

sudo yum install xorg-x11-server-Xvfb
#啓動 Xvfb
Xvfb :0 -screen 0 1366x768x24+32 -br +bs -ac &
#修改環境變量 DISPLAY
export DISPLAY=:0
#查看環境變量 DISPLAY
$DISPLAY
#查看 Xvfb 進程
ps -ef | grep Xvfb

如果只是爲了使用 webdriver 操作瀏覽器那麼這樣安裝運行 Xvfb 後就可以了,但是我們要使用 PyAutoGUI,所以還有依賴要裝。

安裝火狐瀏覽器

我個人比較偏好 ESR 版火狐,下載後解壓就可以使用了。

tar -xf firefox-115.5.0esr.tar.bz2
cd Firefox
./firefox
#如果要指定窗口大小可以
./firefox -width 1350 -height 764

安裝 x11vnc 服務

其實只要下載執行檔,運行即可,非常簡單。不過 x11vnc 12 年未有更新,不知道還能用多久。如果那天不能用了可以嘗試 Tiger VNC。

mv x11vnc-0.9.13_amd64-Linux x11vnc
chmod +x x11vnc
#運行 vnc server,密碼設置長一點,端口是 9999
./x11vnc -display :0 -ncache 0 -passwd piHrcHxmJauvIOftenUseA64digitPasswordpokiHJHQWdsgcGFTG -rfbport 9999
#上面命令在一次連接後會停止,如果要服務一直可以用,就加上 forever 參數
./x11vnc -display :0 -ncache 0 -passwd piHrcHxmJauvIOftenUseA64digitPasswordpokiHJHQWdsgcGFTG -rfbport 9999 -shared -forever
#注意服務器的網絡防火牆要打開 9999 端口
#用 nmap 查看端口是否打開
nmap -p 9999 1.1.1.1

Fedora 本地可以安裝 Remmina 作爲 VNC 客戶端。

sudo dnf install remmina -y
#如果想要使用 socks5 代理
proxychains4 /usr/bin/remmina

打開 Remmina 後在地址欄的協議選項裏選擇 VNC,然後地址填 1.1.1.1:9999 回車就可以連上服務器的桌面並看到剛剛打開的火狐瀏覽器進行設置了。點左上角的 + 號可以添加 profile,這樣下次雙擊就能連上 VNC 了。

安裝與配置 PyAutoGUI

我自己從源碼編譯的 Python 一直提示沒有 _tkinter 模塊。搜了半天沒有解決,於是使用系統自帶的 Python 3.9 得以解決。雖然我是用 Python 3.11 開發的,但是 Python 3.9 跑起來也沒問題。

import _tkinter # If this fails your Python may not be configured for Tk
ImportError: No module named _tkinter
#安裝 Python 3.9 以及依賴
sudo yum install libnsl ImageMagick xclip
sudo yum install python39 python39-tkinter

#xdotool 並不支持 Xvfb,所以不用裝
#sudo yum install xdotool

#創建虛擬環境
cd your_project
python3.9 -m venv venv
source venv/bin/activate
pip install -r requirements.txt

示例代碼

import json
import random
import sys
import requests
import time
import logging
import os
import pyperclip
import subprocess
from urllib.parse import urlparse, parse_qs, urlunparse
from dotenv import load_dotenv
import psutil
import pyautogui
import pyscreeze

script_dir = os.path.dirname(os.path.realpath(__file__))

load_dotenv()
api_key = os.getenv("API_KEY")
proxy = os.getenv("PROXY")
de = os.getenv("DE")
batch = int(os.getenv("BATCH"))

if proxy is None:
    proxies = None
else:
    proxies = {"http": proxy, "https": proxy}

logging.basicConfig(
    level=logging.INFO, format="%(asctime)s - %(levelname)s - %(message)s"
)
logger = logging.getLogger()
# Create a file handler to save logs to a file
log_file = os.path.join(script_dir, "logfile.log")
file_handler = logging.FileHandler(log_file)

# Set the logging level for the file handler (if different from the root logger)
file_handler.setLevel(logging.INFO)  # Adjust the log level if needed

# Create a formatter and add it to the file handler
formatter = logging.Formatter("%(asctime)s - %(levelname)s - %(message)s")
file_handler.setFormatter(formatter)

# Add the file handler to the logger
logger.addHandler(file_handler)


def activate_window(window_title):
    if de == "Xvfb":
        firefox_exists = False
        for proc in psutil.process_iter():
            try:
                if "firefox" in proc.name().lower():
                    firefox_exists = True
                    break
            except (psutil.NoSuchProcess, psutil.AccessDenied, psutil.ZombieProcess):
                pass
        if firefox_exists is False:
            subprocess.Popen(
                [
                    "/home/centos/fred/programs/firefox/firefox",
                    "-width",
                    "1350",
                    "-height",
                    "764",
                ]
            )
            logger.info("firefox started")
            time.sleep(10)
    elif de == "Xfce":
        command = f"xdotool search --onlyvisible --name '{window_title}' windowactivate"
        subprocess.run(command, shell=True)


def wait_for_image(image_path, timeout=10):
    start_time = time.time()
    while time.time() - start_time < timeout:
        try:
            location = pyautogui.locateOnScreen(
                image_path, region=(0, 0, 1360, 760), confidence=0.9, grayscale=True
            )
            if location:
                return location
        except pyautogui.ImageNotFoundException:
            pass
        time.sleep(1.5)
    return None


def wait_for_images(image_path, timeout=10):
    start_time = time.time()
    while time.time() - start_time < timeout:
        try:
            location = pyautogui.locateAllOnScreen(
                image_path, region=(0, 0, 1366, 760), confidence=0.9
            )
            if location:
                return list(location)
        except pyautogui.ImageNotFoundException:
            pass
        except pyscreeze.ImageNotFoundException:
            pass
        time.sleep(1.5)
    return []

def right_click():
    pyautogui.mouseDown(button="right")  # Perform a right-click
    time.sleep(0.1)  # Adjust the delay if needed (time in seconds)
    pyautogui.mouseUp(button="right")  # Release the right-click


def triple_click(x, y):
    for _ in range(3):
        pyautogui.click(x, y)
        time.sleep(0.1)

def get_data(obj):
    start_time = time.time()
    time.sleep(0.5)
    activate_window("Mozilla Firefox")
    time.sleep(0.5)
    # load webpage
    url_profile = obj["contact_name_href"]
    if url_profile.find("?") != -1:
        url_profile = url_profile[: url_profile.find("?")]
    logger.info(url_profile)
    # open a new tab
    # pyautogui.hotkey('ctrl', 't')
    pyautogui.hotkey("ctrl", "l")
    time.sleep(0.5)
    pyautogui.typewrite(url_profile)
    time.sleep(0.5)
    pyautogui.press("enter")
    time.sleep(8)

    # check page loaded
    image_path = os.path.join(script_dir, "img/ContactDetails.png")
    loaded = wait_for_image(image_path, 40)

    # Box(left=535, top=541, width=74, height=19)
    if loaded:
        logger.info("Page loaded")

    # LinkedIn
    image_path = os.path.join(script_dir, "img/LinkedIn.png")
    l = wait_for_images(image_path, 3)
    l_index = 0
    retry = 0
    temp_l = None
    while l_index < len(l):
        logger.info(f"l_index:{l_index+1}/{len(l)}")
        if temp_l is not None:
            if temp_l[0] == l[l_index][0]:
                l_index = l_index + 1
                continue
        li = l[l_index]
        pyautogui.moveTo(li, duration=2, tween=pyautogui.easeInOutQuad)
        time.sleep(0.5)
        pyautogui.click(li)
        time.sleep(2)
        pyautogui.hotkey("ctrl", "l")
        time.sleep(0.5)
        pyautogui.hotkey("ctrl", "c")
        time.sleep(0.5)
        pyautogui.hotkey("ctrl", "w")
        time.sleep(0.5)
        copied_text = pyperclip.paste()
        url = copied_text.strip()
        url = get_link_from_redirect(url)

        if url is not None and url != "":
            # logger.info(len(url))
            if url.find("linkedin") == -1:
                logger.info("not found 'linkedin'")
                if retry < 3:
                    retry = retry + 1
                else:
                    l_index = l_index + 1
                continue

            # personal LindedIn
            if li[0] < loaded_x_left:
                obj["LinkedIn_Personal_URL"] = url
            else:
                obj["LinkedIn_URL"] = url
        temp_l = li
        l_index = l_index + 1

    # Supplemental_Email
    image_path = os.path.join(script_dir, "img/Supplemental.png")
    l = wait_for_image(image_path, 3)
    if l:
        pyautogui.moveTo(
            l[0] + l[2] + 50 + random.randint(-5, 5),
            l[1] + l[3] / 2,
            duration=1,
            tween=pyautogui.easeInOutQuad,
        )
        time.sleep(1)
        right_click()
        time.sleep(1)
        pyautogui.hotkey("l")
        time.sleep(1)
        pyautogui.hotkey("esc")
        # [email protected]
        copied_text = pyperclip.paste()
        obj["Supplemental_Email"] = copied_text.strip()

    # Local address
    image_path = os.path.join(script_dir, "img/Local.png")
    l = wait_for_image(image_path, 3)
    if l:
        x = l[0] + l[2] + 30 + random.randint(-5, 5)
        pyautogui.moveTo(x, l[1] + l[3] / 2, duration=1, tween=pyautogui.easeInOutQuad)
        time.sleep(1)
        triple_click(x, l[1] + l[3] / 2)
        time.sleep(1)
        pyautogui.hotkey("ctrl", "c")
        time.sleep(1)
        # [email protected]
        copied_text = pyperclip.paste()
        obj["Local_Location_Address"] = copied_text.strip()

def main(max_id):
    failed_list = []
    for i in range(batch):
        logger.info(f"batch:{i+1}/{batch}")
        obj = get_job()
        if obj is None:
            continue
        if obj["contact_name_href"] == "" or obj["contact_name_href"] is None:
            res = post_job(obj)
            logger.info(res)
            continue

        if obj["id"] > max_id:
            logger.info("max_id reached")
            continue
        obj = get_data(obj)
        if obj["message"] != "success":
            if obj["id"] in failed_list:
                res = post_job(obj)
                logger.info(res)
            else:
                failed_list.append(obj["id"])
            continue

        res = post_job(obj)
        logger.info(res)

if __name__ == "__main__":
    # time.sleep(10)
    # countdown
    for i in range(6):
        logger.info(f"countdown:{6-i}")
        time.sleep(1)

    # get max id from command
    if len(sys.argv) > 1:
        max_id = int(sys.argv[1])
        logger.info(f"max_id:{max_id}")
    else:
        max_id = 9999999

    main(max_id)
分類
程序

下載指定版本 Chromium 與其 Webdriver

以下載 Linux 平臺 119 版本 Chromium 與其 Webdriver 爲例:

首先在 Chromium 版本發佈頁 找到想要下載版本的 Branch Base Position 比如 1204232。然後在 https://commondatastorage.googleapis.com/chromium-browser-snapshots/index.html?prefix=Linux_x64/ 中搜索 1204232。如果發現搜索結果爲空,不用怕,把最後一位去掉試試,這時就會搜到 1204234。也可以再刪掉一位,就會出來更多相近的結果。點進去後下載 chrome-linux.zip 和 chromedriver_linux64.zip 就可以了。

unzip chrome-linux.zip
cd chrome-linux
#查看 Chrome 版本
./chrome --version
#Chromium 119.0.6045.0

在 Selenium 中指定 Chrome、Webdriver 與 Profile 位置

import os
import 
import datetime
import undetected_chromedriver as uc

MAX_RUNTIME_SECONDS = 240
# Check for and kill any Chrome processes that have been running for too long
for proc in psutil.process_iter():
    try:
        if "chrome" in proc.name().lower():
            create_time = proc.create_time()
            elapsed_time = time.time() - create_time
            if elapsed_time > MAX_RUNTIME_SECONDS:
                proc.kill()
                print("killed" + proc.name())
    except (psutil.NoSuchProcess, psutil.AccessDenied, psutil.ZombieProcess):
        pass

script_dir = os.path.dirname(os.path.realpath(__file__))
profile_dir = os.path.join(script_dir, "chrome_profile")
path_to_chrome_binary = os.path.abspath(
    script_dir + "/../../" + "chrome-linux64/chrome"
)
driver_executable_path = os.path.abspath(
    script_dir + "/../../" + "chromedriver-linux64/chromedriver"
)
proxy = "socks5://127.0.0.1:8080"

options = uc.ChromeOptions()
options.add_argument("--disable-notifications")
options.add_argument("--disable-gpu")
options.add_argument("--no-sandbox")
options.add_argument("--disable-dev-shm-usage")
options.add_argument("--disable-save-password-bubble")

# Limit CPU and memory usage
options.add_argument("--disable-software-rasterizer")
options.add_argument("--disable-extensions")
# options.add_argument("--disable-webgl")

options.add_argument(proxy)
options.binary_location = path_to_chrome_binary

# if os.getenv("DEBUG") != "True":
#     options.add_argument("headless=True")

prefs = {
    "credentials_enable_service": False,
    "profile.password_manager_enabled": False,
    "profile.privacy_sandbox_prompt_enabled": False,
    # "profile.managed_default_content_settings.images": 1,
}
options.add_experimental_option("prefs", prefs)

try:
    driver = uc.Chrome(
        executable_path=driver_executable_path,
        browser_executable_path=path_to_chrome_binary,
        options=options,
        version_main=119,
        user_data_dir=profile_dir,
        # use_subprocess=False,
    )
except Exception as e:
    return None


driver.set_window_size(1366, 768)
driver.set_page_load_timeout(30)

#fix timeout bug
try:
    driver.get(url)
except Exception as e:
    try:
        #send Esc key to stop loading
        driver.find_element(By.XPATH, '//body').send_keys(Keys.ESCAPE)
        time.sleep(1)
        # check page loaded
        WebDriverWait(driver, 10).until(
                EC.visibility_of_element_located(
                    (By.XPATH, "//dl[@class='dfn']")
                )
            )
    except Exception as e:
        #take a screen shot
        png_name = datetime.datetime.now().isoformat()[:19]
        driver.save_screenshot(png_name + "_load" + ".png")
        return None
分類
软件

Paseo 步數記錄軟件

散步是人生中的大事,而 Paseo 可以記錄與督促它。祝大家都有一個健康的體魄。

上個月,F-Droid 被 DNS 污染,這個月遭遇不同程度屏蔽。

分類
程序

免費使用 AWS Lambda 的一個示例

這裏演示一下免費使用 AWS Lambda 創建一個查詢網頁大小的接口。之所以直接使用 Lambda 生成的鏈接而不是 API Gateway 的鏈接,是因爲 API Gateway 的免費額度是在註冊帳號的一年內有效。而且 API Gateway 最大超時只有 30 秒,而 Lambda 可以設置到 15 分鐘。

首先註冊一個帳號,我記得只要郵箱和手機號就行,不用綁定支付方式。然後在控制台搜索 Lambda 進入 Lambda 控制台。點擊 Funtction > Create function. 選擇 Author from scratch,輸入函數名字沒有特殊要求,Runtime 選 Python 3.10,Architecture 選 x86 和 arm64 都可以,各有免費額度。點開 Advanced settings,勾選 Enable function URL,勾選 None。CORS 看需要也可以勾上,然後點擊右下角 Create function 就可以了。

在函數頁面 Code 標籤頁貼上如下代碼:

import json
import os
import random
import urllib.request

UA = '''Mozilla/5.0 (Windows NT 10.0; Win64; x64) AppleWebKit/537.36 (KHTML, like Gecko) Chrome/114.0.0.0 Safari/537.36 Edge/19041.423
Mozilla/5.0 (Windows NT 10.0; Win64; x64) AppleWebKit/537.36 (KHTML, like Gecko) Chrome/114.0.0.0 Safari/537.36 OPR/87.0.4390.99
Mozilla/5.0 (Windows NT 10.0; Win64; x64) AppleWebKit/537.36 (KHTML, like Gecko) Chrome/114.0.0.0 Safari/537.36 Vivaldi/6.1.3035.111
Mozilla/5.0 (Windows NT 10.0; WOW64; rv:85.0) Gecko/20100101 Firefox/85.0
Mozilla/5.0 (Windows NT 10.0; Win64; x64; Trident/7.0; rv:11.0) like Gecko
Mozilla/5.0 (Windows NT 10.0; Win64; x64) AppleWebKit/537.36 (KHTML, like Gecko) Chrome/98.0.4758.102 Safari/537.36
Mozilla/5.0 (Windows NT 10.0; Win64; x64) AppleWebKit/537.36 (KHTML, like Gecko) Chrome/97.0.4692.99 Safari/537.36
Mozilla/5.0 (Windows NT 10.0; Win64; x64) AppleWebKit/537.36 (KHTML, like Gecko) Chrome/96.0.4664.110 Safari/537.36
Mozilla/5.0 (Windows NT 10.0; Win64; x64) AppleWebKit/537.36 (KHTML, like Gecko) Chrome/95.0.4638.51 Safari/537.36
Mozilla/5.0 (Windows NT 10.0; Win64; x64) AppleWebKit/537.36 (KHTML, like Gecko) Chrome/94.0.4606.71 Safari/537.36'''

US_LIST=UA.split()

def lambda_handler(event, context):
    event_body_str = event['body']
    event_body = json.loads(event_body_str)
    # print(str(event_body))
    if event_body['secret'] == os.environ.get('secret'):
        try:
            t_ua = random.choice(US_LIST)
            res = urllib.request.urlopen(urllib.request.Request(
                url=event_body['url'],
                headers={"User-Agent": t_ua,},
                method='GET'),
                timeout=180)
            content = res.read()
            return {
                'statusCode': 200,
                'body': json.dumps(str(len(content))+' '+event_body['url'])
            }
        except:
            return {
                'statusCode': 500,
                'body': json.dumps('request failed.')
            }
    else:
        return {
            'statusCode': 500,
            'body': json.dumps('unauthorized.')
        }

secret 的環境在 Configuration > Environment variables 中添加。在 General configuration 中可以設置函數的超時時長 Timeout,默認是 3 秒。在 Function URL 裏可以看到我們需要的 URL 類似:https://4xyqiuexi7l3fcnuyuevjgclei0jhpuy.lambda-url.us-east-1.on.aws/ 。使用如下 curl 命令測試下:

curl -X POST -H "Content-Type: application/json" -d '{"secret":"Dn2Xk7d7RDkK_8bILy7lVe2NJlE4y7T_", "url":"http://ip-api.com/json"}' https://4xyqiuexi7l3fcnuyuevjgclei0jhpuy.lambda-url.us-east-1.on.aws/
#應該會得到如下結果
"296 http://ip-api.com/json"

免費額度使用情況可以在 Billing > Free Tier 頁面查看。Lambda 服務每月有 400000 seconds(GB-Second,如果的函數和我的一樣用的是 128 MB,那就可以乘以 8)和 1000000 次請求。